--By James Burnett
Hope you’re doing well today. In this post, I’m going to walk you through how to program the new Baofeng UV-5G Mini. This is Baofeng’s latest handheld GMRS radio, and honestly, it’s a great little radio for the price. If you haven’t seen my full review on it yet, please click here to read.
I’ll show you step-by-step how to add custom frequencies (like your local sheriff, EMS, or fire dispatch), how to navigate the menu system, how to access NOAA weather alerts, and a few of my favorite little tips to get the most out of this radio.
Getting Familiar with the UV-5G Mini
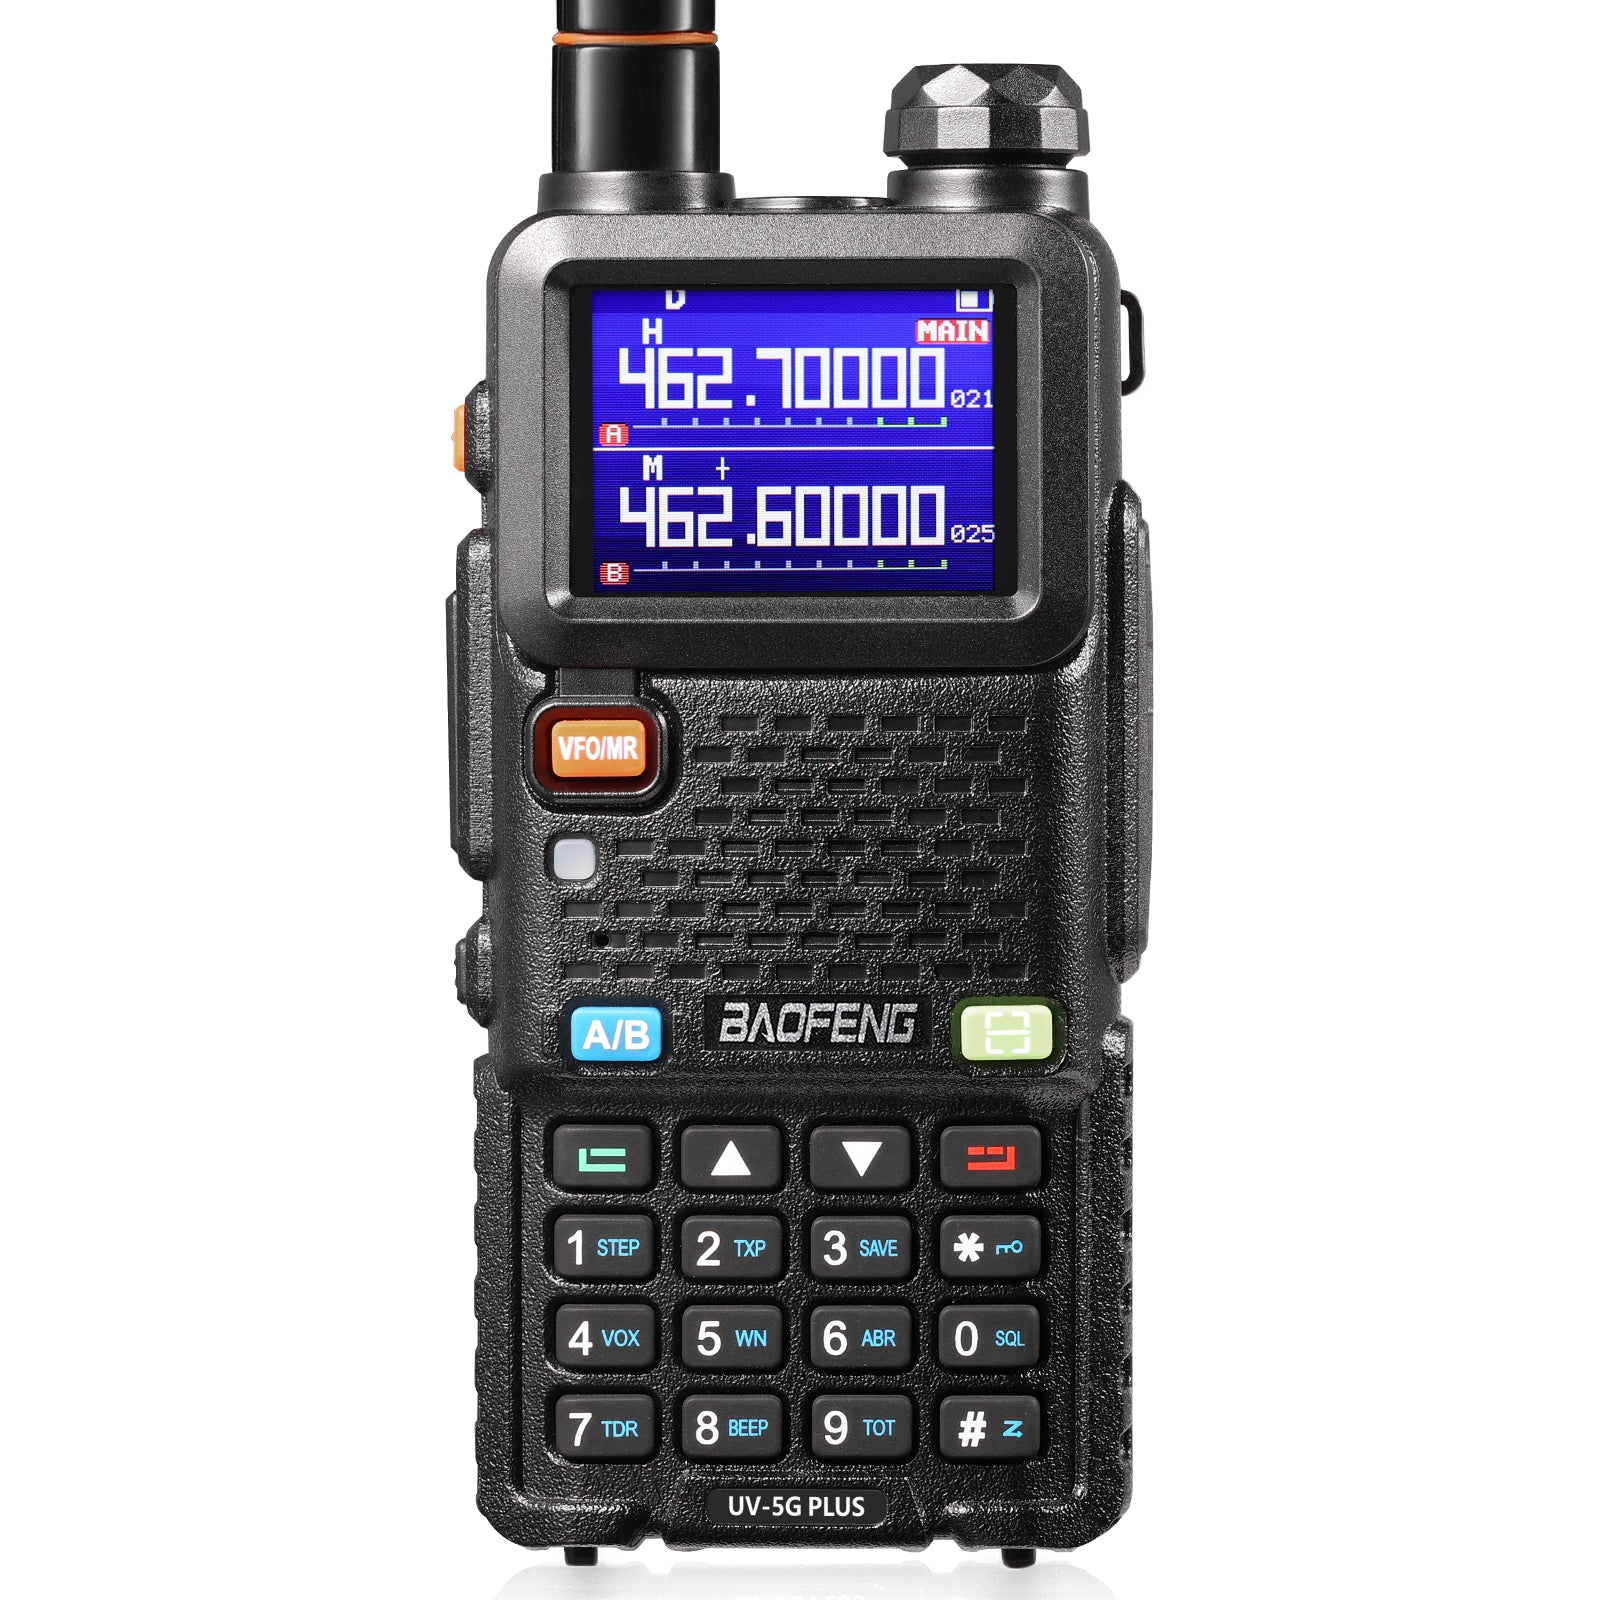
Let’s start with a quick overview of the radio itself. At the top of the screen, you’ve got two displays — the top one is called Display A and the bottom one is Display B. The A/B button lets you switch between the two. Whichever display is highlighted is the one you’re currently controlling.
Just below that are three important buttons:
V/M: Switches between frequency mode and channel mode
Flashlight (middle button with blueish square): Turns the flashlight or strobe on and off
A/B: Toggles between the two displays
You’ll use frequency mode when you want to enter an exact frequency with the keypad, and channel mode when you want to select from GMRS or from custom channels you’ve programmed.
Navigating the Menu System
Below those buttons, you’ll find Menu, Up/Down, and Exit buttons. These are what you’ll use to move around and change settings.
Let’s do a quick example together — turning off the voice and beep sounds. Personally, I prefer my radios to stay quiet unless I’m transmitting.
Press Menu, scroll down to Radio Set, and press Menu again.
Find Voice, press Menu, set it to Off, and save.
Next, go to Beep, turn that Off, and save again.
Press Exit twice to get back to the main screen.
Now your radio won’t make any extra noise while you’re navigating menus — way nicer, right?
Adding a Custom Frequency
Okay, let’s add a custom frequency. This is how you can listen to local dispatch or public service channels.
Make sure you’re in frequency mode (the screen should say “VFO”).
Type in your desired frequency — for example, 460.4000 MHz.
Press Menu, go to Program CH → CH-Memory, and pick an open slot (I usually start around CH-40).
Press Menu again to save, and you should see “Save OK.”
Now switch back to channel mode using the V/M button, scroll to Channel 40, and you’ll see your new custom frequency saved and ready to use.
Making the Display Easier to Read
By default, the UV-5G Mini shows the frequency in small text, which can be hard to read. I like to change mine to show the channel number in big, bold text instead.
Go to Program CH → CH-MDF
Select CH and press Menu to save
Now your display shows CH-40 in large font, which is way easier to see when you’re out in the field.
Adding Channels to the Scan List
You can also add your new channel to the scan group so it scans alongside your GMRS channels.
Go to Program CH → Scan Add
Turn it ON and save
Hold down the # key (with the blue up-arrow label) to start scanning
You’ll see the radio cycling through channels — including the custom one you just added. If you want, you can disable scanning on other channels so it only scans the ones you care about, like your family or local repeater channels.
Listening to NOAA Weather Alerts
The UV-5G Mini has NOAA weather frequencies built right in. This is a great feature to have if you’re using your radio for prepping, camping, or emergency monitoring.
To access weather mode:
Hold down the 0 (WX) button for a couple seconds.
The screen will switch to WX-01 with a little sun-and-cloud icon.
Hold the # key to scan for active weather stations.
Once it finds a broadcast, it’ll stop automatically. When you’re done, just hold 0 again to exit weather mode and return to regular radio operation.
Setting Privacy Tones (CTCSS and DCS)
If you want to block out other people using the same GMRS channel, you can set privacy tones. These don’t make your transmissions private, but they filter out unwanted chatter.
Here’s how I usually do it:
Pick your channel (say CH-18)
Go to Program CH → RX-CTCSS, select a tone like 69.3 Hz, and save
Do the same for TX-CTCSS
Now your radio will only hear transmissions from other radios using that same tone. You can also use DCS tones, which are digital, under RX-DCS and TX-DCS — just remember, you can only use one system at a time.
Using Dual Transmit Mode
One of my favorite features of the UV-5G Mini is the dual transmit setup. You can monitor two channels at once — one on Display A and one on Display B — and transmit on either side with separate buttons.
Just set one display to CH-18 and the other to CH-10 (for example). When you press the A side-button, you’ll transmit on Display A; when you press the B button, you’ll transmit on Display B.
This is super handy if you’re coordinating between two groups — say, family on one channel and a neighborhood team or search-and-rescue group on another.
Wrapping It Up
And that’s pretty much it! You now know how to program the Baofeng UV-5G Mini, add custom channels, tune into NOAA weather, and use privacy tones and dual transmit mode.
This little radio is a powerhouse for its size and price, and once you get comfortable with the menu system, it becomes second nature to customize it for your needs
Thanks for reading, and as always — stay safe, stay connected, and keep those radios ready.
Watch here

0 comments